Tutorial on How to Make Interactive Birthday Cards
Summary: This guide will show you how to make birthday cards online with AmoLink step by step. Besides birthday card, you can make anything you want, like themed cards or invitations, even resumes with this powerful content creator.
Welcome aboard! Now you must be eager to make your own greeting cards with AmoLink. But spend a minute to check out this how-to guide before you start.
The more you put your effort in something, the more you will enjoy it. That’s what we here in AmoLink believe. To make an outstanding interactive work (greeting card, invitation, photo collage, resume, etc.), you should check out this guide first before you ever start. Now, let’s make a birthday card online together.
Once you start, you are given an initial blank page, There are three ways to start editing a new page, by choosing from a layout, a grid or a background.
For fresh starters, we recommend you start by choosing current happy birthday layout. Here is the creation page. At left-hand navigation sidebar, there are many fabulous happy birthday greetings layouts for you. Also, you can change the type of layout to make photo collage or make a resume.
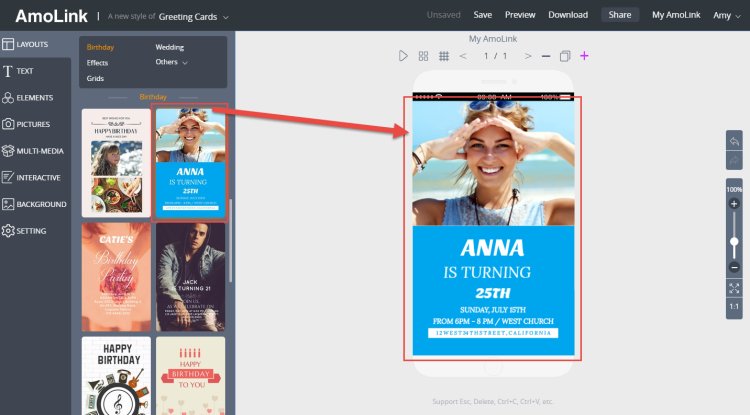
Choose a layout fits your need by clicking. Wait a second for loading.
Great! You like this layout, don’t you! To make your birthday card, you should try to replace the pictures with your own. Before you start the upload process, remember to sign up or sign in first. Then you can upload your photos from your computer. After the upload finished, you can find your photos in “My Pictures”.
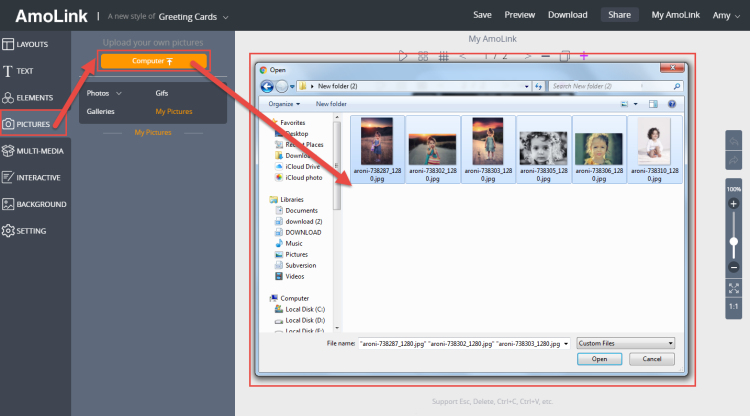
Choose your pictures from your computer and then upload.
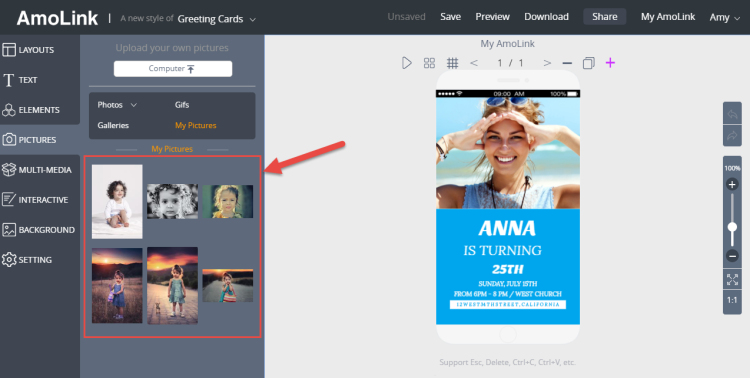
The uploaded picture can be found in My Pictures.
After uploaded, you can drag and drop a photo/picture/GIF to replace the current ones. The picture will adjust its size to suit the frame automatically. A frame can contain multiple pictures. In that case, the pictures will be displayed by order. You can adjust the order by dragging and dropping them in the order you like. Hover the mouse in one picture, you will see a minus sign at the right top side, click on it if you want to delete.
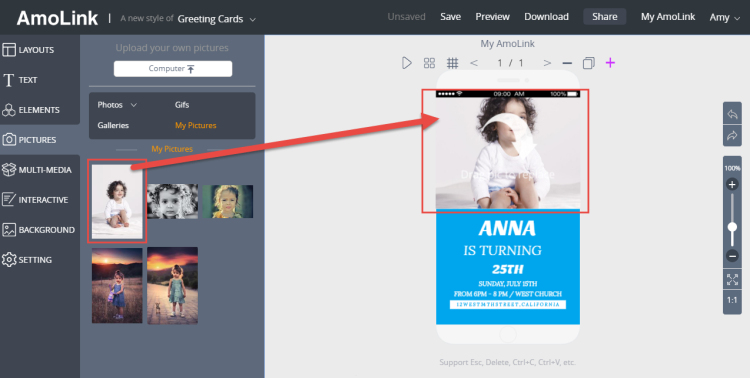
After uploaded, you can drag and drop a picture to replace the current ones.
The page looks good! But how about putting your birthday card wishes in it? It’s even more simple! Just selecting the current text by clicking, the highlighted texts are ready to be replace. Just put your happy birthday card wishes in the box, then that’s it! It’s your own interactive online happy birthday greeting card!
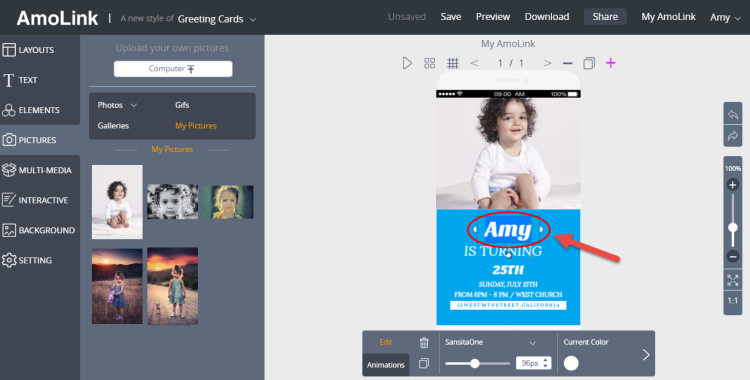
Click on the word and type in the word you want.
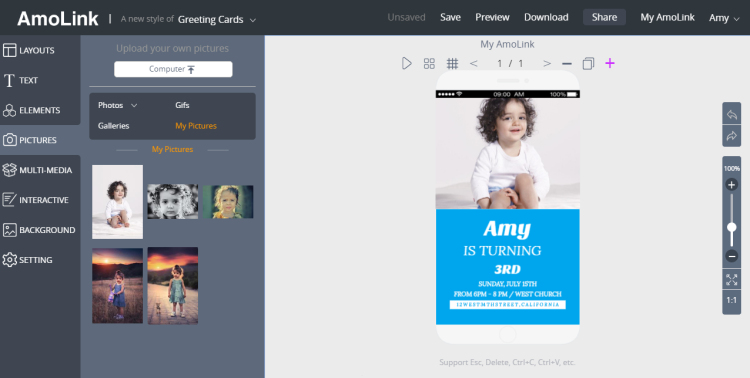
Yeah, we have finished the first page!
Yeah, we have finished the first page! How about making greeting cards with two pages or more? Just click the purple plus sign to add to blank new page, and you are ready to rock! Repeat the previous steps from choosing a layout. Then you get the second page.
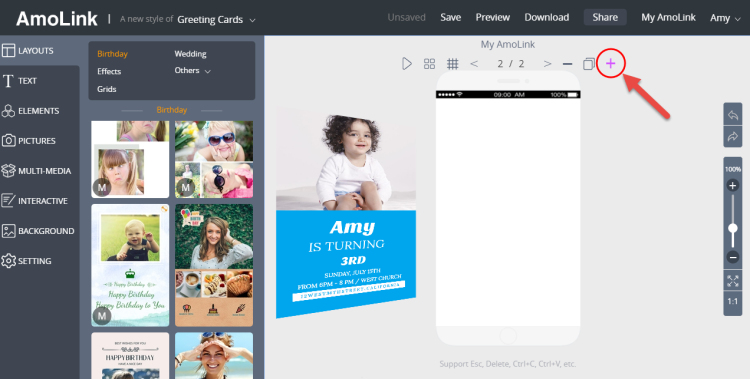
Click on the purple plus sign to add a blank new page.
Add one more page if you wish. The frames will help you define the place and size you want your picture to be.Drag and drop frames from elements to the blank page. You can also add lines, shapes, stickers, Gifs to decorate your work.
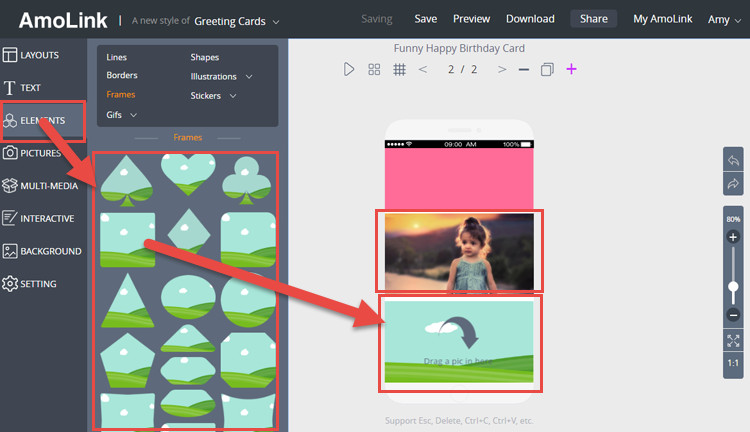
Drag and drop frames from elements to the blank page.
After all the pages are done, preview the work and check. Delete the page if you don’t like it, by clicking on the minus sign above it.After all is done, remember to name your happy birthday card online with title and description in the Setting section, and share with your friends via Facebook, Twitter, LinkedIn, email and so on! I believe they will be surprised with your creative happy birthday cards.
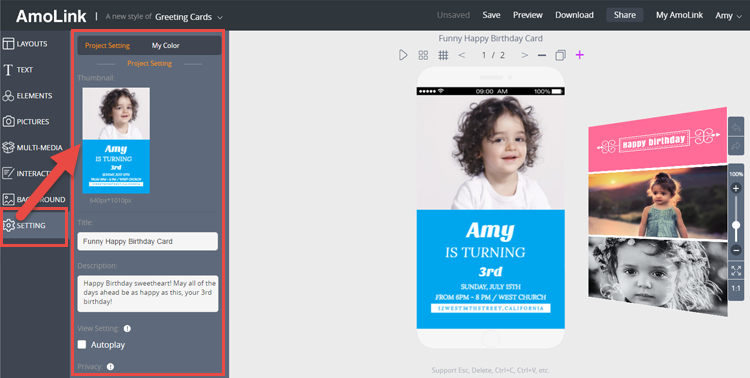
Fill in related information and save. Now you can share your work.
Have you got how to make birthday cards online? Come on, enjoy the process of making your own greeting cards with AmoLink now!
 How to Make Birthday Cards Online with a Card Maker
Unlike a common birthday card maker, there is a complete new one for you to make html5 animated happy birthday cards with heart-warming birthday wishes for your dear ones. With this comprehensive guide, you will know more clearly how to make a birthday card online with this new card creator.
 Say Happy Birthday on Facebook with Photo Cards
A photo collage or photo birthday card containing all past happy memories will make your loved ones move and smile. Especially when integrating music, video, sound and animations into the birthday card design, which make it really more vivid and lively.
 6 Special Birthday Gift Ideas for Her
If your special one's birthday is just approaching and you feel overwhelmed when it comes to searching a perfect birthday gift for her, then you may get in trouble! It can be quite hard on someone when you have to come up with unique birthday gift ideas for her, particularly when she seems to have everything by that time. In order to make the job a bit easier, here we have listed some practical and warm-feeling birthday gift ideas for you to wish your loved ones happy birthday.